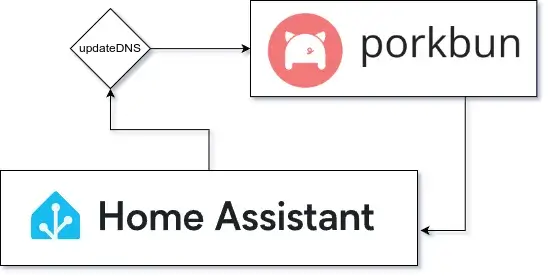
Dynamic DNS is very helpful, to be able to access your local network, when your are not at home. This article shows, how to manage your porkbun.com DNS records and how to keep them in sync with your local network with the help of home assistant.
It is a fantastic idea to deploy your own cloud services at home, to embrace digital freedom and have full control over your own data. But to be able to manage your cloud, passwords, smarthome or automations, your little server in the form of a raspberry pi, odroid or similar device needs to be accessible from the outside world.
Likely your internet service provider refreshes your DHCP lease once per day, and assigns a new IP address to your network. To be able to access your network without guesswork, it is recommended to have your own domain or subdomain, which points to that network address. I am going to show you, how to update the DNS records of your at porkbun.com registered domain via home assistant and porkbun API to reference your current IP.
Well, of course there are plenty of ways to update DNS records (ddclient, custom scripts, ...), but I chose home assistant as base of operations, because I can easily track and monitor changes with the home assistant app or even telegram messenger. In this article I am going to assume, that you already have set up a home assistant service. So let's get started.
Porkbun API preparations
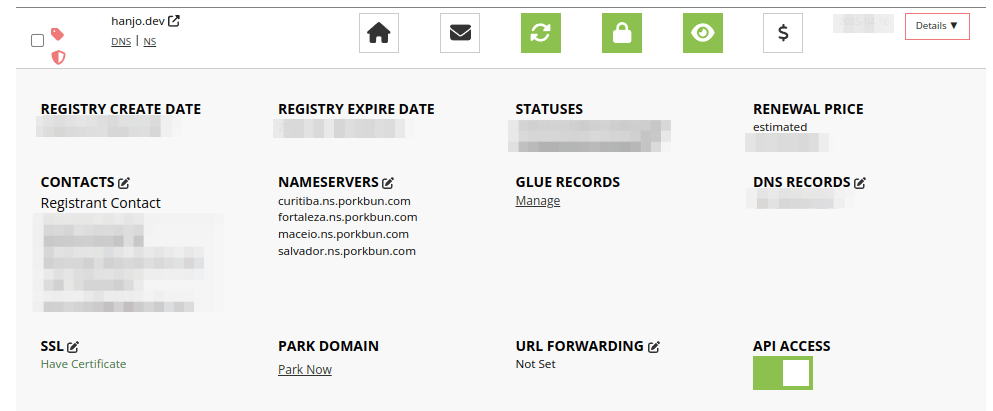
The porkbun API is the only way to update your DNS records dynamically, but to be able to use it, you have to enable it.

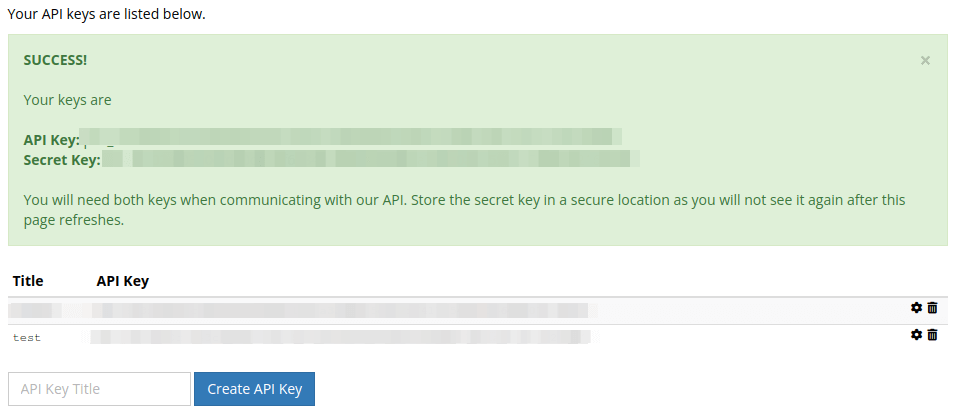
To finally be allowed to communicate wth the API, you are supposed to generate an API key. For demonstrating purposes, I visited the API access page, and created a pair of API keys with the API Key Title "test".

So please write down both API and secret key. They won't be shown again.
That's it. Now we are ready to interact with the API.
Setting up a subdomain with the porkbun API v3
For testing purposes we create a test.YOUR_DOMAIN subdomain, which we'll use later to update with our current IP address. There are several ways to achieve this: By either using the web interface and add a related A record, or by using the API, which I will demonstrate here.
The porkbun API v3 documentation helps you to find out the appropriate endpoints
and its necessary parameters to make successful requests.
Create a new subdomain A record by running the following curl script via commandline:
curl --header "Content-Type: application/json" \
  --request POST \
  --data '{
    "apikey" : "<YOUR_API_KEY>",
    "secretapikey" : "<YOUR_SECRET_KEY>",
    "name" : "test",
    "type" : "A",
    "content" : "127.0.0.1",
    "ttl" : "600"
  }' \
  https://porkbun.com/api/json/v3/dns/create/<YOUR_DOMAIN>
Don't forget to replace the API keys and the domain with your own data. In this example, I prefilled the DNS entry with a loopback address (127.0.0.1) as a dummy. This will be substituted by your network IP address later. The request response should look like this:
{"status":"SUCCESS","id":NEW_PORKBUN_DNS_ID}To verify the newly created entry, either run another curl script to get the required information, or have a look at the Domain Management, if an entry has been aquired correctly.
curl --header "Content-Type: application/json" \
    --request POST \
     --data '{
    "apikey" : "<YOUR_API_KEY>",
    "secretapikey" : "<YOUR_SECRET_KEY>"
  }'   https://porkbun.com/api/json/v3/dns/retrieve/<YOUR_DOMAIN>
The json array response should contain an entry with a NEW_PORKBUN_DNS_ID integer matching the id of the previous request's response.
{"status":"SUCCESS","records":
  [{
    "id":"NEW_PORKBUN_DNS_ID",
    "name":"test.YOUR_DOMAIN",
    "type":"A",
    "content":"127.0.0.1",
    "ttl":"600",
    "prio":"0",
    "notes":null
  }]
}
Great, now we have set up a subdomain DNS A record with the help of the porkbun API v3.
Establish your home assistant sensors
If you own and use a fritzbox router, and I assumed, you already have been using home assistant in your local environment, a combination of home assistant REST commands and the AVM FRITZ!Box Tools does the job flawlessly.
Option 1: Get your IP changes via AVM FRITZ!Box Tools
To be able to make post requests, we well use AVM FRITZ!Box Tools to get our networks external IP. Luckily, the plugin has an entity for that. To get the entity ID, navigate to Settings / Devices & services / Entities and search for 'external'.

Your sensor ID is sensor.fritz_box_7590_external_ip.
Option 2: Get your IP changes via RESTful sensor
If you do not possess a fritzbox, you can establish your own sensor, which checks for IP changes in a defined interval. RESTful sensors come into play, if you need to run things periodically and triggerless. Think of them as process daemons running in the background.
We'll set up a RESTful sensor, which checks for IP changes every 5 minutes, and uses public address services provided by ipify.org - an open source API with no request limits. Thank you, ipify.org, for being so kind.
sensor:
  - platform: rest
    resource: "https://api.ipify.org/"
    name: "ip_get"
    scan_interval: 300
Put the code snippet into your configuration.yaml and fully restart your home assistant software. A partial restart won't do.
Your sensor ID is sensor.ip_get.
Create the home assistant RESTful command
The state value of the sensor ID is what we will be feeding the porkbun API with. Thereafter we prepare the REST command to be able to update the appropriate DNS record. As you probably know, home assistant is to be configured using its configuration.yaml. Insert the following snippet into it, and don't forget to replace the variables with your data:
rest_command:
  porkbun_update:
    url: "https://porkbun.com/api/json/v3/dns/edit/<YOUR_DOMAIN>/<NEW_PORKBUN_DNS_ID>"
    method: POST
    # use either `sensor.fritz_box_7590_external_ip` or `sensor.ip_get` in your payload
    payload: '{"apikey":"<YOUR_API_KEY>", "secretapikey":"<YOUR_SECRET_KEY>", "type":"A", "name":"test", "content":"{{ states("sensor.fritz_box_7590_external_ip") }}"}'
    headers:
      Content-Type: application/json
Deploy a home assistant automation
In the next step we will build a home assistant automation, which checks the sensor entity for state changes, and sends updates to the porkbun API v3 if changes apply. This way we only dispatch requests when necessary.
To include the automation, go to Settings / Automations & scenes, and initialize a new automation by clicking the CREATE AUTOMATION button. We add an entity state trigger, that watches the external IPv4, and send the POST request to porkbun, if the state provided is valid. It sometimes happens, that home assistant states trigger a false negative due to temporary connection shortages. It happens rarely, but I have perceived them. The solution is to add a conditional statement before sending out any requests.
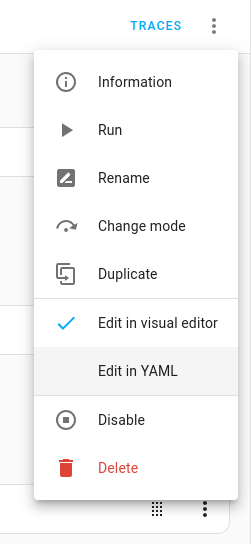
By clicking the three-dots and Edit in YAML, we can paste in the automation YAML configuration directly.

# use either `sensor.fritz_box_7590_external_ip`
#   or `sensor.ip_get` in your payload
alias: porkbun_update_your_domain
trigger:
  - platform: state
    entity_id:
      - sensor.fritz_box_7590_external_ip
condition:
  - alias: ip is valid
    not:
      - condition: state
        entity_id: sensor.fritz_box_7590_external_ip
        state: unavailable
      - condition: state
        entity_id: sensor.fritz_box_7590_external_ip
        state: unknown
action:
  - service: rest_command.porkbun_update
mode: single
Switching between the visual editor and the YAML view gives us great flexibility to test and run parts of the automation. You can test-run the condition, or simply send the POST request directly.
My fritzbox router is configured, that it does create a new lease between 6 and 7 a.m. And thats when the automation will be executed automatically. A nifty move!
Pro tip: If you have a telegram bot configured, you could even send a notification to your desired channel. I recommend this - especially when introducing and testing new automations - to stay informed about changes or misbehaviours immediately.
# use either `sensor.fritz_box_7590_external_ip` or `sensor.ip_get` in your payload
action:
  - service: rest_command.porkbun_update
  - service: telegram_bot.send_message
    data:
      message: DNS update {{states('sensor.fritz_box_7590_external_ip')}} via hassio
It's time to test the automation. Press the big -> Run button, or simply wait until your ISP provides you with a new IP.
Congratulations! Your home assistant instance is now maintaining your DNS requirements. Nice!
